iTimothy

君看一叶舟,出没风波里


  • 首页

  • 分类

  • 归档

  • 项目

  • 关于

防止对话框程序按Enter和ESC退出的对策

发表于 2004-09-25 | 分类于 技术控 | | 阅读次数:
字数统计: 523 字 | 阅读时长 ≈ 2 分钟

在一般情况下编写的对话框程序,用户在运行的时候,如果不注意按下了ENTER或者ESC键,程序就会立刻退出,之所以会这样,是因为按下Enter键时,Windows就会自动去找输入焦点落在了哪一个按钮上,当获得焦点的按钮的四周将被点线矩形包围。如果所有按钮都没有获得输入焦点,Windows就会自动去寻找程序或资源所指定的默认按钮(默认按钮边框较粗)。如果对话框没有默认按钮,那么即使对话框中没有OK按钮,OnOK函数也会自动被调用,对于一个普通的对话框程序来说,OnOK函数的调用,以为着程序会立刻退出。为了使Enter键无效,最简单的办法就是将CExDlg的OnOK函数写成空函数,然后针对OK按钮写一个新的函数来响应。ESC键的原理也是如此,它是默认和OnCancel函数映射在一起的。对于ESC键,需要自己重载CDialog类的PreTranslateMessage函数,当发现是ESC键的时候,过滤掉这个消息或者是替换掉这个消息。

一下是简单的代码示例:

[biggrin]【方法1】 可以先重载OnOK函数 voidCTestDlg::OnOK() { //里面什么也不写}

然后重载PreTranslateMessage函数 把ESC键的消息,用RETURN键的消息替换,这样,按ESC的时候,也会执行刚才的OnOK函数,这样问题就可以解决了。

BOOL CxxxDlg::PreTranslateMessage(MSG* pMsg) { if(pMsg->message==WM_KEYDOWN && pMsg->wParam==VK_ESCAPE) { pMsg->wParam=VK_RETURN; //将ESC键的消息替换为回车键的消息,这样,按ESC的时候 //也会去调用OnOK函数,而OnOK什么也不做,这样ESC也被屏蔽 } return CDialog::PreTranslateMessage(pMsg);

}

[biggrin]【方法2】

直接在重载的PreTranslateMessage函数中屏蔽回车和ESC的消息,和以上方法大同小异:

BOOL CxxxDlg::PreTranslateMessage(MSG* pMsg) { if(pMsg->message==WM_KEYDOWN && pMsg->wParam==VK_ESCAPE) return TRUE; if(pMsg->message==WM_KEYDOWN && pMsg->wParam==VK_RETURN) return TRUE; else return CDialog::PreTranslateMessage(pMsg); }

单词小助手V1.0

发表于 2004-09-07 | 分类于 我的拙作 | | 阅读次数:
字数统计: 650 字 | 阅读时长 ≈ 2 分钟

单词小助手是我学VC数据库开发的一个练手的软件,主要采用ADO+ACCESS编程结构。由于学VC不久,所以这个小软件虽然功能不太多,但是也花了我几天的时间,做这个软件其实是自己突发奇想,自己在背单词的时候,总是写在本子上,一次一次地背,但是时间久了,不但单词忘了,就连背单词地本子也找不到了。:( 索性写了这个小软件。 该软件的主要功能,就是帮助你记忆单词。将自己不认识的单词加入,然后背诵,对背诵过的单词进行标记,随着标记次数的增多,相信你的单词量也不知不觉增加了。这是一个测试版本,可能很多功能并不完善,我以后还会对这个软件进行更多的改进。争取不断退出2.0,3.0版本呵呵……

程序预览图:

程序主要用到的核心技术和代码:

1.Splash窗口的逐渐淡出效果 采用到NT系统一个未公开的API。 在头文件加入#define WS_EX_LAYERED 0x00080000 定义API函数结构: typedef BOOL (WINAPI *lpfn)(HWND hWnd,COLORREF cr,BYTE bAlpha,DWORD dwFlags); lpfn g_pSetLayeredWindowAttributes; 从DLL取出该API函数地址: HMODULE hUser32 = GetModuleHandle(_T(“USER32.DLL”)); g_pSetLayeredWindowAttributes = (lpfn)GetProcAddress(hUser32,”SetLayeredWindowAttributes”); 调整目标窗口属性: ::SetWindowLong(hWindow,GWL_EXSTYLE,GetWindowLong(hWindow,GWL_EXSTYLE)^WS_EX_LAYERED); 调用函数,实现透明效果: g_pSetLayeredWindowAttributes(hWindow,5,50,2); ::RedrawWindow(hWindow, NULL, NULL,RDW_ERASE | RDW_INVALIDATE | RDW_FRAME | RDW_ALLCHILDREN); 逐渐淡出效果,是采用了WM_TIMER消息,在OnTimer响应函数中,采用一个变量不断自减,和不断调用以上函数,来实现Splash窗口逐渐淡出的效果。

2.主程序背景窗口实现: 背景是一张我自己绘制的BMP图片,然后将其导入到工程中。 在窗口的OnPaint()函数中,加入如下代码: CPaintDC dc(this); CRect rect; GetClientRect(▭);//得到窗体的大小 CDC dcMem; dcMem.CreateCompatibleDC(&dc;); CBitmap bmpBackground; bmpBackground.LoadBitmap(IDB_BITMAP1);//加载背景图片 BITMAP bitMap; bmpBackground.GetBitmap(&bitMap;); CBitmap *pbmpOld=dcMem.SelectObject(&bmpBackground;); dc.StretchBlt(0,0,rect.Width(),rect.Height(),&dcMem;,0,0,bitMap.bmWidth,bitMap.bmHeight,SRCCOPY); 将背景图片画在窗口上。如果需要较快的速度,可以采用BitBlt函数。

3.按钮主要是采用了CButtonST类,这个类的功能很丰富,实现也很简单,在这里就不重复了。可以方便地在网上找到代码和示例。

该程序源代码下载:

点击下载此文件

WIN2000/XP程序下载:

点击下载此文件

WIN98程序下载:

点击下载此文件

个人财务记帐系统

发表于 2004-09-07 | 分类于 我的拙作 | | 阅读次数:
字数统计: 1.3k 字 | 阅读时长 ≈ 6 分钟

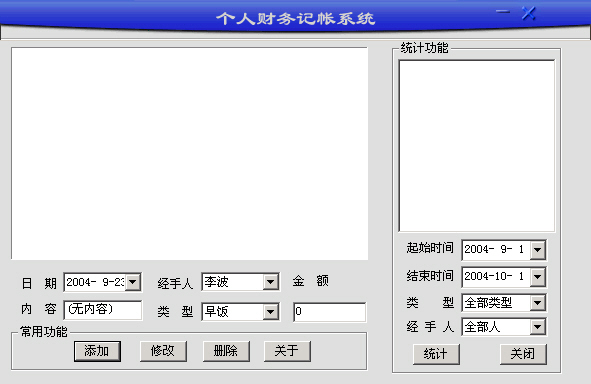
这是我改写的一个个人财务记帐系统,其主要功能是将个人每天的财务状况记录到数据库,并有统计功能。 这个程序主要采用目前比较流行的ADO技术,考虑到程序的小巧和方便,存取采用ACCESS数据库实现。

核心代码实现如下:

(1)、引入ADO类

#import “c:\program files\common files\system\ado\msado15.dll” \ no_namespace \ rename (“EOF”, “adoEOF”) (2)、初始化COM

在MFC中可以用AfxOleInit();非MFC环境中用: CoInitialize(NULL); CoUnInitialize();

(3)#import 包含后就可以用3个智能指针了:_ConnectionPtr、_RecordsetPtr和_CommandPtr

1.连接和关闭数据库 (1)连接

例子:连接Access数据库 m_pConnection.CreateInstance(__uuidof(Connection)); try { // 打开本地Access库Demo.mdb m_pConnection->Open(“Provider=Microsoft.Jet.OLEDB.4.0;DataSource=Demo.mdb”, “”,””,adModeUnknown); } catch(_com_error e) { AfxMessageBox(“数据库连接失败,确认数据库Demo.mdb是否在当前路径下!”); return FALSE; } (2)、关闭

//如果数据库连接有效 if(m_pConnection->State) m_pConnection->Close(); m_pConnection= NULL;

(3)、设置连接时间 //设置连接时间———————————– pConnection->put_ConnectionTimeout(long(5)); 2.打开一个结果集

(1)打开,首先创建一个_RecordsetPtr实例,然后调用Open()得到一条SQL语句的执行结果 _RecordsetPtr m_pRecordset; m_pRecordset.CreateInstance(__uuidof(Recordset));

// 在ADO操作中建议语句中要常用try…catch()来捕获错误信息, // 因为它有时会经常出现一些意想不到的错误。jingzhou xu try { m_pRecordset->Open(“SELECT FROM DemoTable”,// 查询DemoTable表中所有字段 m_pConnection.GetInterfacePtr(), // 获取库接库的IDispatch指针 adOpenDynamic, adLockOptimistic, adCmdText); } catch(_com_error e) { AfxMessageBox(e->ErrorMessage()); }

(2)关闭结果集 m_pRecordset->Close();

3.操作一个结果集

(1)、遍历(读取) a)、用pRecordset->adoEOF来判断数据库指针是否已经移到结果集的末尾了;m_pRecordset->BOF判断是否 在第一条记录前面: while(!m_pRecordset->adoEOF) { var = m_pRecordset->GetCollect(“Name”); if(var.vt != VT_NULL) strName = (LPCSTR)_bstr_t(var); var = m_pRecordset->GetCollect(“Age”); if(var.vt != VT_NULL) strAge = (LPCSTR)_bstr_t(var); m_AccessList.AddString( strName + “ –> “+strAge ); m_pRecordset->MoveNext(); }

b)、取得一个字段的值的办法有两种办法

一是

//表示取得第0个字段的值 m_pRecordset->GetCollect(“Name”);

或者 m_pRecordset->GetCollect(_variant_t(long(0));

二是 pRecordset->get_Collect(“COLUMN_NAME”);

或者 pRecordset->get_Collect(long(index));

(2)、添加

a)、调用m_pRecordset->AddNew(); b)、调用m_pRecordset->PutCollect();给每个字段赋值 c)、调用m_pRecordset->Update();确认

(3)、修改 (4)、删除 a)、把记录指针移动到要删除的记录上,然后调用Delete(adAffectCurrent) try { // 假设删除第二条记录 m_pRecordset->MoveFirst(); m_pRecordset->Move(1); // 从0开始 m_pRecordset->Delete(adAffectCurrent); // 参数adAffectCurrent为删除当前记录 m_pRecordset->Update(); } catch(_com_error *e) { AfxMessageBox(e->ErrorMessage()); }

4.直接执行SQL语句,除了要用到结果集其余的大部分功能都可以直接用SQL语言实现

(1)、用_CommandPtr和_RecordsetPtr配合 _CommandPtr m_pCommand; m_pCommand.CreateInstance(__uuidof(Command)); // 将库连接赋于它 m_pCommand->ActiveConnection = m_pConnection; // SQL语句 m_pCommand->CommandText = “SELECT FROM DemoTable”; // 执行SQL语句,返回记录集 m_pRecordset = m_pCommand->Execute(NULL, NULL,adCmdText); (2)、直接用_ConnectionPtr执行SQL语句 _RecordsetPtr Connection15::Execute ( _bstr_t CommandText, VARIANT RecordsAffected, long Options )

其中CommandText是命令字串,通常是SQL命令。 参数RecordsAffected是操作完成后所影响的行数, 参数Options表示CommandText中内容的类型,Options可以取如下值之一: adCmdText:表明CommandText是文本命令 adCmdTable:表明CommandText是一个表名 adCmdProc:表明CommandText是一个存储过程 adCmdUnknown:未知

例子: _variant_t RecordsAffected; m_pConnection->Execute(“UPDATE users SET old = old+1”,&RecordsAffected;,adCmdText); 5.调用存储过程 (1)、利用_CommandPtr _CommandPtr m_pCommand; m_pCommand.CreateInstance(__uuidof(Command)); m_pCommand->ActiveConnection = m_pConnection; // 将库连接赋于它 m_pCommand->CommandText = “Demo”; m_pCommand->Execute(NULL,NULL, adCmdStoredProc); (2)、直接用_ConnectionPtr直接调用(见4.(2))

6.遍历数据库中的所有表名 _ConnectionPtr m_pConnect; _RecordsetPtr pSet; HRESULT hr; try { hr = m_pConnect.CreateInstance(“ADODB.Connection”); if(SUCCEEDED(hr)) { CString dd; dd.Format(“Provider=Microsoft.Jet.OLEDB.4.0;Data Source=%s”,file); hr = m_pConnect->Open((_bstr_t)dd,””,””,adModeUnknown); pSet = m_pConnect->OpenSchema(adSchemaTables); while(!(pSet->adoEOF)) { //获取表格 _bstr_t table_name = pSet->Fields->GetItem(“TABLE_NAME”)->Value;

        //获取表格类型
        _bstr_t table_type = pSet->Fields->GetItem("TABLE_TYPE")->Value;

        //过滤一下,只输出表格名称,其他的省略
        if ( strcmp(((LPCSTR)table_type),"TABLE")==0){
            CString tt;
            tt.Format("%s",(LPCSTR)table_name);
            AfxMessageBox(tt);
        }
        pSet->MoveNext();
    }
    pSet->Close();
}
m_pConnect->Close();

}catch(_com_error e)///捕捉异常 { CString errormessage; errormessage.Format(“连接数据库失败!rn错误信息:%s”,e.ErrorMessage());

AfxMessageBox(errormessage);
return -1;

} 7.遍历一个表中的所有字段 Field field = NULL; HRESULT hr; Fields fields = NULL; hr = m_pRecordset->get_Fields (&fields;); //得到记录集的字段集和

if(SUCCEEDED(hr)) fields->get_Count(&ColCount;);

//得到记录集的字段集合中的字段的总个数 for(i=0;iItem[i]->get_Name(&bstrColName;); //得到记录集//中的字段名 strColName=bstrColName; nameField = strColName; m_FieldsList.AddString(nameField); } if(SUCCEEDED(hr)) fields->Release();//释放指针

附: 1、_variant_t (1)、一般传给这3个指针的值都不是MFC直接支持的数据类型,而要用_variant_t转换一下 _variant_t(XX)可以把大多数类型的变量转换成适合的类型传入: (2)、_variant_t var;_variant_t -> long: (long)var; _variant_t -> CString: CString strValue = (LPCSTR)_bstr_t(var); CString -> _variant_t: _variant_t(strSql); 2、BSTR宽字符串与CString相互转换

BSTR bstr; CString strSql; CString -> BSTR: bstr = strSql.AllocSysString(); BSTR -> CString: strSql = (LPCSTR)bstr; 3、_bstr_t与CString相互转换

_bstr_t bstr; CString strSql; CString -> _bstr_t: bstr = (_bstr_t)strSql; _bstr_t -> CString: strSql = (LPCSTR)bstr; 4、关于时间 Access:表示时间的字符串#2004-4-5# Sql:表示时间的字符串’’2004-4-5’’ DateField(时间字段) select * from my_table where DateField > #2004-4-10#

源代码下载:

点击下载此文件

应用程序下载:

点击下载此文件

另一个特殊矩阵的Java实现

发表于 2004-09-07 | 分类于 技术控 | | 阅读次数:
字数统计: 0 字 | 阅读时长 ≈ 1 分钟

蛇形矩阵的代码

发表于 2004-09-07 | 分类于 技术控 | | 阅读次数:
字数统计: 0 字 | 阅读时长 ≈ 1 分钟

进程杀手v1.0

发表于 2004-09-07 | 分类于 我的拙作 | | 阅读次数:
字数统计: 43 字 | 阅读时长 ≈ 1 分钟

这是一个能枚举当前系统进程,并且终止进程的小程序。 程序界面如下:

程序源代码下载:

点击下载此文件

CMD界面下的关机程序

发表于 2004-09-07 | 分类于 我的拙作 | | 阅读次数:
字数统计: 29 字 | 阅读时长 ≈ 1 分钟

此程序运行在CMD界面下,支持多参数选择

源代码下载:

点击下载此文件

自动关机程序

发表于 2004-09-07 | 分类于 我的拙作 | | 阅读次数:
字数统计: 103 字 | 阅读时长 ≈ 1 分钟

主要实现了定时关机的功能 在NT系统下,和win98不同,需要调整本进程的权限。 主要代码如下:

void EnableDebugPriv( void ) { HANDLE hToken; LUID sedebugnameValue; TOKEN_PRIVILEGES tkp;

if ( ! OpenProcessToken( GetCurrentProcess(), TOKEN_ADJUST_PRIVILEGES | TOKEN_QUERY, &hToken ) ) return; if ( ! LookupPrivilegeValue( NULL, SE_DEBUG_NAME, &sedebugnameValue ) ) { CloseHandle( hToken ); return; } tkp.PrivilegeCount = 1; tkp.Privileges[0].Luid = sedebugnameValue; tkp.Privileges[0].Attributes = SE_PRIVILEGE_ENABLED; if ( ! AdjustTokenPrivileges( hToken, FALSE, &tkp, sizeof tkp, NULL, NULL ) ) CloseHandle( hToken ); }

本程序源代码下载:

点击下载此文件

局域网消息轰炸机

发表于 2004-09-07 | 分类于 我的拙作 | | 阅读次数:
字数统计: 88 字 | 阅读时长 ≈ 1 分钟

这是我最初开始学习VC时候的一个比较拙劣的作品。呵呵。 其主要功能就是利用NT系统自带的信使服务功能,对目标机器进行消息轰炸。 受害者的机器可能一直弹出收到消息的画面。

全部代码下载

点击下载此文件

在VC中使用WMI(英文原版)

发表于 2004-09-07 | 分类于 技术控 | | 阅读次数:
字数统计: 832 字 | 阅读时长 ≈ 5 分钟

作者:BugSearcher Introduction We normally find a lot of ways and a number of resources to use WMI or to get information from “Windows Management Instrumentation” while using Visual Basic 6 and C#, but I could not find a single resource describing the same thing in Visual C++. MSDN resources are also very limited in this context.

Code Following is the code on how to get the current processor load from a WMI class Win32_Processor defined in a .mof file. .mof files are managed object files which have a typical way of defining classes and methods.

WMI provides the COM service which is used to connect to the WMI services. The important parts of the code include:

bstrNamespace : The initialization of this variable is very tricky. The first three forward slashes //./ represent the Host Computer name from which you want to get information from. A “.” Indicates that information is to be obtained from the Same Computer on which you are working. You can give any Network name here but getting information from network depends upon your Access Rights etc. cimv2 is the namespace containing the Win32_Processor class. pIWbemLocator is the argument in which we get the Interface pointer. After that, we call the function ConnectServer of the pIWbemLocator to get a pointer to pWbemServices. WMI uses its own Query Language to get information known as WQL (the acronym for WMI Query Language). So, when calling the function ExecQuery, we have to specify the language as its first argument. Second argument is the Query itself. Last argument is important because here we get a pointer to an Enumeration object through which we can enumerate through the objects available. This enumeration is important because consider the case that we want to know the information about running processes and we are using Win32_Process class for this purpose. Then through this enumeration object, we can go through different processes one by one. By calling the Reset and Next methods of pEnumObject, we are moving through the objects. We get the pointer to an object in pClassObject. The last function through which we get the Actual value of a property is Get. We pass a BSTR to this function to get the value in a Variant. CoInitialize(NULL);

//Security needs to be initialized in XP first

if(CoInitializeSecurity( NULL, -1, NULL, NULL, RPC_C_AUTHN_LEVEL_PKT, RPC_C_IMP_LEVEL_IMPERSONATE, NULL, EOAC_NONE, 0 ) != S_OK) return;

IWbemLocator pIWbemLocator = NULL; IWbemServices pWbemServices = NULL; IEnumWbemClassObject pEnumObject = NULL; BSTR bstrNamespace = (L”root\cimv2”); HRESULT hRes = CoCreateInstance ( CLSID_WbemAdministrativeLocator, NULL , CLSCTX_INPROC_SERVER | CLSCTX_LOCAL_SERVER , IID_IUnknown , ( void ** ) & pIWbemLocator ) ; if (SUCCEEDED(hRes)) { hRes = pIWbemLocator->ConnectServer( bstrNamespace, // Namespace NULL, // Userid NULL, // PW NULL, // Locale 0, // flags NULL, // Authority NULL, // Context &pWbemServices; ); } BSTR strQuery = (L”Select from win32_Processor”); BSTR strQL = (L”WQL”); hRes = pWbemServices->ExecQuery(strQL, strQuery, WBEM_FLAG_RETURN_IMMEDIATELY,NULL,&pEnumObject;);

ULONG uCount = 1, uReturned; IWbemClassObject * pClassObject = NULL; hRes = pEnumObject->Reset(); hRes = pEnumObject->Next(WBEM_INFINITE,uCount, &pClassObject;, &uReturned;); VARIANT v; BSTR strClassProp = SysAllocString(L”LoadPercentage”); hRes = pClassObject->Get(strClassProp, 0, &v;, 0, 0); SysFreeString(strClassProp);

_bstr_t bstrPath = &v; //Just to convert BSTR to ANSI char strPath=(char)bstrPath; if (SUCCEEDED(hRes)) MessageBox(strPath); else MessageBox(”Error in getting object”); VariantClear( &v; ); pIWbemLocator->Release(); pWbemServices->Release(); pEnumObject->Release(); pClassObject->Release(); CoUninitialize(); Conclusion This was the shortest method I was able to work out to get information from any WMI class. You can simply change the class name in the Query and Property Name while calling Get method and you will get information from all the classes supported in your OS. I tested this code in Windows 2000 Professional. I hope it will work well for Win XP but probably not in previous versions of windows because they don’t support a lot of WMI classes.

Update I am updating this Article and the code for Windows XP. As I said in the beginning, this was initially intended for Windows 2K and it was still working fine on Windows 2K machine (I have checked it on at least 10 now coz I was getting so many complaints). Well, for Windows XP there is one major change and that was suggested by igoychev. Many thanks for that. The problem with Windows XP was that it needed security to be initialized first. Plus, I have also changed those confusing slashes in bstrNamespace to some simpler ones. I am using Windows 2003 Advance Server and it is working fine on it. You need to include wbemuuid.lib in Project Settings -> Linker -> Additional Dependencies to get this code working. I have also added some error checking to avoid crashes, hope it works for you. You need to have Platform SDK installed for this code to compile. WMI SDK is not necessary once again. Sorry rbervgm, your work was great using WMI SDK but I thought better to keep it WMI SDK Clean. Hope you don’t mind. Now, I hope that downloadable project will work for most of the people. One more thing, it still works for Windows 2K machines.

自增操作的反汇编分析

发表于 2004-09-07 | 分类于 技术控 | | 阅读次数:
字数统计: 550 字 | 阅读时长 ≈ 2 分钟

在考试或者做题的时候,经常遇到这类问题,出题的老师就是爱在这点上面钻牛脚尖,那就是自增自减操作的组合运算,我个人认为,考这样的题,没多大意思,因为各个编译器不同,出来的结果也不同,而且这样有一种误导,而失去了语言学习的本质,真正的程序员,也不会写出这样的代码,除非有神经病,呵呵。但是我们还是得面对……悲哀啊。下面我用汇编来分析一下这个例子:

1
2
3
4
5
6
7
8
9
#include "stdio.h"
int main()
{
int i=0,n = 0;
n = (++i)+(++i)+(++i);
printf(" n = %d\n",n);
printf(" i = %d\n",i);
return 0;
}

我在VC++.NET下编译通过,结果为:n=9,i=3 让我用STUDIO2003.NET的调试器来分析一下: 相关反汇编代码如下:(各语句后面有我的注释)

1
2
3
4
5
6
7
8
9
10
11
12
13
14
15
16
17
int i=0,n = 0;
00411A4E mov dword ptr [i],0 ;i初始化为0
00411A55 mov dword ptr [n],0 ;n初始化为0
n = (++i)+(++i)+(++i);
00411A5C mov eax,dword ptr [i] ;eax=0;
00411A5F add eax,1 ;eax=eax+1,所以eax=1
00411A62 mov dword ptr [i],eax ;把1赋值给i
00411A65 mov ecx,dword ptr [i] ;把i装入ecx,此时ecx=1
00411A68 add ecx,1 ;ecx=ecx+1,此时ecx=2
00411A6B mov dword ptr [i],ecx ;把ecx赋值给i,此时i=2
00411A6E mov edx,dword ptr [i] ;把i装入edx,(edx)=2
00411A71 add edx,1 ;edx=edx+1,(edx)=3
00411A74 mov dword ptr [i],edx ;把edx的置放回i,i=3
00411A77 mov eax,dword ptr [i] ;eax=3
00411A7A add eax,dword ptr [i] ;eax=eax+i=3+3=6
00411A7D add eax,dword ptr [i] ;eax=eax+3=6+3=9
00411A80 mov dword ptr [n],eax ;n=(eax)=9

从以上反汇编过程可以看出,n=9,i=3,输出后也如此。输出的汇编代码就不贴了。

不同的编译器输出的结果可能不同,我想,可能反汇编出来的代码也不一样,所以结果自然也不一样了。

从这里可以看出,通过反汇编的代码来分析,思路会清晰很多。studio2003.net的编译器,对于(++i)+(++i)+(++i);这种运算,是先算i,也即将三个++i先算出来,结果等于3,然后才算括号外面的加法,结果当然是n=3+3+3=9。

一个有趣的GDI图形测试程序

发表于 2004-09-07 | 分类于 技术控 | | 阅读次数:
字数统计: 182 字 | 阅读时长 ≈ 1 分钟

这是一个有趣的GDI图形测试程序,其主要功能就是获取在桌面上绘图,结果是……你的桌面会一团遭,像病毒一样,看了你会吓一跳,但是有惊无险 :)

一下程序在VC++.NET下编译通过。

#include “stdafx.h”

#include “stdlib.h”

int APIENTRY WinMain(HINSTANCE hInstance, HINSTANCE hPrevInstance, LPSTR lpCmdLine, int nCmdShow) { MessageBox(NULL,”Written by Cooldog. :)”,”hehe…”,MB_OK); HDC myDC; //获取屏幕分辨率 RECT ScrRect; GetWindowRect(GetDesktopWindow(), &ScrRect); myDC=GetDC((HWND)0); //获取设备环境 for(long i=0;i<100000L;i++) { int x, y, width, height; x=(rand()%ScrRect.right)/2-(width=rand()%3); //随机产生坐标 y=rand()%ScrRect.bottom-(height=rand()%3); BitBlt(myDC, x, y, x+width, y+height, myDC, x+rand()%3-1, y-rand()%2, SRCCOPY); //绘图 } ReleaseDC((HWND)0, myDC); InvalidateRect(0, NULL, TRUE); return 0; }

1…464748
Timothy

Timothy

Timothy的技术博客,记录技术以及生活点滴

565 日志
8 分类
1187 标签
RSS
github twitter
Links
  • ZWWoOoOo
  • 花開未央
  • 守望轩
  • 大漠说程序
  • ChengBo
  • BlueAndHack
  • 程序员小辉
  • 子痕的博客
  • WoodenRobot
  • VPS大佬
  • 毕扬博客
  • VPSDad
  • 猫爪导航
  • ss1271的奋斗
  • Kian.Li
  • YoungForest
  • Fred's Blog
  • Jacklandrin
© 2025 Timothy
由 Hexo 强力驱动
|
主题 — NexT.Muse v5.1.4